How to Get V-Line Abs
It’s impossible to talk about “V-line” abs without mentioning the music video that brought the V-line to our collective consciousness nearly 20 years ago: Untitled (How Does it Feel?) by D’Angelo.
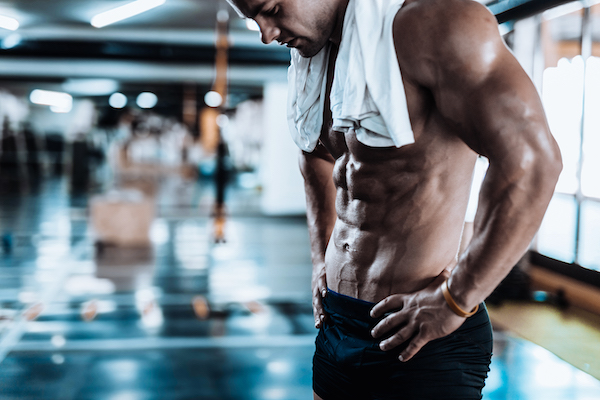
For nearly four and a half minutes, a single camera focuses on the shirtless R&B singer whose melody is catchy, his falsetto impressive, but his chiseled abs are the real showstoppers. They start at his sternum and run down to his pelvis, forming a perfectly defined abdominal “V” shape.
D’Angelo did more than evoke sex appeal — he delivered an anatomy lesson, and a call to action that still resonates. Even today, anyone who watches How Does it Feel? is left with a different question: “What are V-line abs, and how can I get them?”
What Is the V-Line?
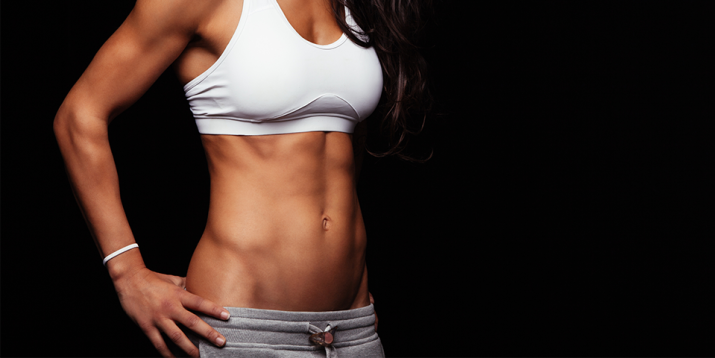
Technically, a V-line involves more than just chiseled abs; it’s also about the presentation of your inguinal ligament line on your body, says Dr. Theresa Marko, PT, DPT, MS, OCS, board-certified orthopedic clinical specialist in physical therapy and owner of Marko Physical Therapy, PLLC.
“The rectus abdominis muscle, i.e. your six-pack, runs from your sternum down to your pubic bone. As it gets closer to your pubic bone, it becomes more narrow to attach to your pubic symphysis,” she says.
The narrow portion of the muscle is framed by the inguinal ligament, which helps keep your organs inside your belly. “These ligaments and the rectus abdominis together create the visual of a ‘V,'” Marko explains.
While everyone has an inguinal ligament, not everyone has V line abs. “[The V-line] will show up on very slim people with minimal belly fat who also have a developed rectus abdominis muscle,” Marko says.
In other words, V-line abs take some work.
How to Get V-Line Abs
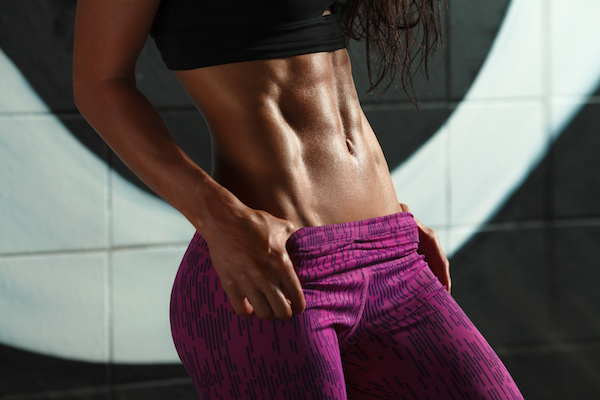
Getting V-line abs is easier for some people than it is for others, and much depends on how and where your body preferentially stores fat. “People with apple- and pear-shaped bodies [in which fat tends to build up in the middle regions] are going to have a harder time,” Marko says.
But no matter where your body tends to store fat, losing overall body fat is the key to achieving V-line abs.
“You might have a six-pack under a layer of fat that needs to be [lost] in order to see ab definition,” explains Caleb Backe, a certified personal trainer and health and wellness expert for Maple Holistics. “You need to maintain a healthy diet and work out rigorously to achieve chiseled abs.”
So let’s take a look at the two main factors: nutrition and training.
Eating for V-line abs
When it comes to losing weight — or more specifically, lowering your body fat percentage to the point where your abs and V-line show — diet is more important than exercise. That’s because your body stores excess calories as fat.
So even if you work out intensely and religiously, you’ll have a tough time dropping pounds if you eat more calories than you burn each day.
“To lose weight, you need to figure out how many calories you need to consume each day to maintain your current weight, and then eat slightly less than that to create a ‘calorie deficit,'” explains Trevor Thieme, C.S.C.S.
He adds that there are plenty of online calculators that can help you determine your ideal caloric intake for your goals. “And remember, when it comes to calories and nutrition, it’s not just about quantity — quality is important as well.”
In short, to achieve your fat loss goals and reveal your V-line, you need to pay attention not only to how much you eat, but also what you’re eating.
“Do your best to cut down on added sugars and processed foods and increase your consumption of high-quality carbs, proteins, and fats,” says Thieme. “A 40-30-30 ratio of carbs to protein to fat works well for most people and most goals.”
Exercises for V-line abs
Stepping up your exercise routine will also help you increase your daily calorie deficit by increasing how many you burn.
High-intensity interval training (HIIT) can be especially helpful in jump-starting weight loss, as it requires a longer recovery period and keeps your metabolism elevated for up to 48 hours afterward (the “afterburn effect” from steady state cardio, for comparison, only lasts a few hours).
Strength training is similarly beneficial thanks to its similarly long afterburn effect. Of course, you’ll also need to incorporate more core work into your routine to sculpt a defined V-line. The following exercises are an excellent start.
Plank
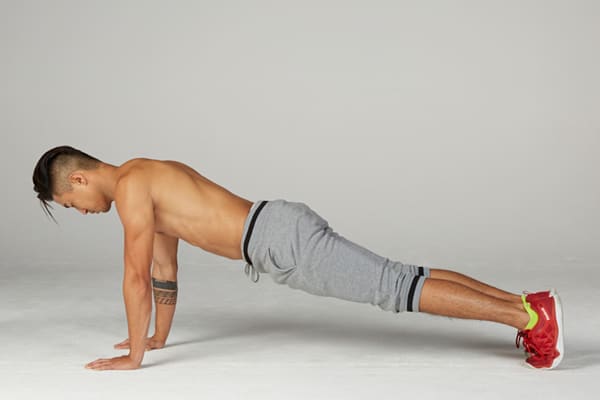
- Assume a push-up position with your legs together, your body straight from head to heels, your arms straight, and your hands in line with (but slightly wider than) your shoulders.
- Engage your core and squeeze your glutes to keep your body rigid and stable.
- Hold the position for as long as you can. (Here are some tips on building up to a five-minute plank.)
- To increase the difficulty of the move, bend your elbows and place your forearms on the floor, supporting your weight on them instead of your hands.
Reverse crunch
- Lie on your back with your arms at your sides, your legs together, and your hips and knees bent 90 degrees. This is the starting position.
- Contract your abs to lift your hips, low back, and mid back off the ground while keeping your feet together.
- Pause, and then return to the starting position.
Reciprocating slow switch kick
- Lie on your back in “banana” position: arms extended with your elbows near your ears, head off the floor, legs straight, feet together and raised about 12 inches off the floor. Press your lower back into the floor. This is your starting position.
- Keeping your upper body still, your legs straight, and your feet flexed (toes pulled toward shins), raise your left leg as high as possible.
- Simultaneously lower your left leg back to the starting position as you raise your right leg as high as possible.
- Continue alternating sides for one minute, performing equal reps on each side.
Alternating leg kick-out
- Lie on your back with your arms at your sides, your legs together, and your hips and knees bent 90 degrees. This is the starting position.
- Straighten your right leg, lowering it until your right heel is an inch or two off the ground. Pause, and then return to the starting position.
- Repeat, this time extending your left leg. Continue alternating legs.
Weighted hip drop
- Lie on your left side propped up on your left elbow and forearm, shoulders stacked over your elbow, legs stacked on top of each other, and hold a dumbbell in place on top of your right hip.
- Raise your hips so that your body forms a straight line from head to heels. This is the starting position.
- Keeping your core braced, slowly lower your left hip, tapping it gently on the floor.
- Reverse the move, returning to side plank position.
- Repeat for reps, then switch sides, performing equal reps on each side.